บทที่ 2
บทที่ 2 — การติดตั้ง
thClaws มาในรูปแบบ binary ตัวเดียวคือ thclaws — รันในโหมด
desktop GUI ได้ (ไม่ใส่ flag) หรือสลับเป็น CLI REPL (--cli) หรือ
โหมดหนึ่ง turn สำหรับ script (-p "prompt") ก็ได้จาก flag เดียวกัน
ดาวน์โหลด build ที่ตรงกับ OS และ CPU ของคุณได้จาก:
https://thclaws.ai/downloads.html
มี build ให้สำหรับ:
| OS | สถาปัตยกรรม |
|---|---|
| macOS | Apple Silicon (arm64), Intel (x86_64) |
| Linux | x86_64, arm64 |
| Windows | x86_64, arm64 |
เลือก build ให้ตรงกับ OS และสถาปัตยกรรม CPU ของเครื่อง — โหลดผิด build
binary จะรันไม่ได้ (ถ้าไม่แน่ใจว่าเครื่องเป็น arm64 หรือ x86_64
ดูจาก uname -m บน macOS/Linux หรือ System Information > “System type”
บน Windows)
ความต้องการของระบบ
ตัว thClaws เองมีขนาดเล็ก — ดาวน์โหลดราว ๆ 17 MB (single-arch
tarball หลัง gzip) แตกไฟล์เป็น binary ราว ๆ 25 MB สำหรับ
thclaws-cli หรือ 40 MB สำหรับ GUI build (thclaws) และใช้ RAM
ราว ๆ 250–400 MB ตอนรัน ซึ่งส่วนใหญ่เป็นของ webview ที่ระบบปฏิบัติการ
ให้มาเอง (WKWebView บน macOS, WebView2 บน Windows, WebKit2GTK บน
Linux)
| ขั้นต่ำ | ที่แนะนำ | |
|---|---|---|
| OS | macOS 12+ · Windows 10+ · Linux ที่มี webkit2gtk-4.1 (Ubuntu 22.04+, Fedora 38+) | เวอร์ชัน stable ล่าสุด |
| CPU | 64-bit x86_64 หรือ ARM64 ของช่วง 10 ปีมานี้ | multi-core รุ่นใหม่ ๆ |
| RAM | ว่างอยู่ 2 GB | รวมทั้งเครื่อง 8 GB |
| Disk | ~50 MB | SSD |
| Network | จำเป็นถ้าใช้ cloud provider (Anthropic / OpenAI / Gemini / OpenRouter / Z.ai / DashScope); ถ้าใช้แต่ Ollama หรือ LMStudio ในเครื่อง ก็ไม่ต้องใช้เน็ต | broadband |
ถ้าใช้ thClaws กับ cloud provider อย่างเดียว — โน๊ตบุ๊คซื้อมาในช่วงไม่กี่ ปีหลัง ๆ รันได้สบาย ๆ ส่วนกรณีรันโมเดลในเครื่องเอง (local) เพดานสเปก มาจาก runtime ของโมเดล (Ollama / LMStudio) ไม่ใช่ตัว thClaws — ดูตัวเลข RAM/VRAM ตามขนาดโมเดลในส่วน “ทางเลือก: Ollama สำหรับใช้งาน local ล้วน ๆ” ด้านล่าง
อยาก build จาก source? thClaws เป็น open source — clone github.com/thClaws/thClaws แล้วเลือกได้สองแบบ:
- GUI version (ตัวเดียวกับที่เราปล่อย binary ให้ดาวน์โหลด): build
thclawsที่รันได้ทั้ง GUI,--cliและ-pต้องมี frontend bundle ก่อนเสมอ เพราะ Rust crate embedfrontend/dist/index.htmlตอน compile
bash
  $ cd frontend && pnpm install && pnpm build && cd ..
  $ cargo build --release --bin thclaws --features gui \
      --manifest-path crates/core/Cargo.toml
- CLI-only version (ไม่มีใน release — build เองถ้าต้องการ): ไม่มี dependency ของ GUI (WebKit / WebView2) compile ไวกว่า เหมาะกับ เซิร์ฟเวอร์ headless หรือ container ที่ไม่ต้องการหน้าต่าง
bash
  $ cargo build --release --bin thclaws-cli \
      --manifest-path crates/core/Cargo.toml
ต้องใช้ Rust stable ตัวปัจจุบัน (ทั้งสองแบบ) และ Node.js 20+ กับ pnpm 10+ สำหรับ GUI build สำหรับผู้ใช้ส่วนใหญ่เราแนะนำให้ใช้เส้นทางการติดตั้งด้วย download ด้านล่างมากกว่า
ติดตั้ง
macOS
แนะนำ — universal .dmg installer
- ดาวน์โหลด
thclaws-<version>-universal-apple-darwin.dmg— ไฟล์เดียวรองรับทั้ง Apple Silicon และ Intel ไม่ต้องเลือก architecture - ดับเบิลคลิก
.dmgแล้วลาก thClaws ไปยังโฟลเดอร์ Applications เมื่อหน้าต่าง installer เปิดขึ้น - เปิด thClaws จาก Launchpad หรือ Spotlight ครั้งแรก Gatekeeper อาจขึ้นว่า “thClaws can’t be opened because Apple cannot check it for malicious software” — กด OK จากนั้นเข้า System Settings → Privacy & Security เลื่อนลงไปที่ข้อความเรื่อง thClaws แล้วกด Open Anyway macOS จะจำตัวเลือกไว้
- แอป desktop จะติดตั้ง CLI shim ของ
thclawsและthclaws-cliลงใน$PATHตอนเปิดครั้งแรก (ผ่านเมนู Install CLI tools ถ้า ไม่ทำให้อัตโนมัติ) หลังจากนั้นเรียกthclawsกับthclaws-cliได้จากทุก terminal
แค่นั้น — ไม่ต้องแก้ PATH ไม่ต้องล้าง xattr
ติดตั้งแบบ manual (ทางเลือกสำรอง) — สำหรับเครื่อง headless / SSH / สั่งผ่าน script ที่รัน GUI installer ไม่ได้
1. ดาวน์โหลด tarball ตาม architecture: `thclaws-Linux
- ดาวน์โหลด
thclaws-<version>-<arch>-unknown-linux-gnu.tar.gz - แตกไฟล์แล้วติดตั้ง:
bash
   $ tar -xzf ~/Downloads/thclaws-*-linux-gnu.tar.gz
   $ mkdir -p ~/.local/bin
   $ install -m 755 thclaws ~/.local/bin/
- ตรวจให้แน่ใจว่า
~/.local/binอยู่ในPATH(distro ส่วนใหญ่ตั้งไว้ ให้แล้วผ่าน~/.profileถ้ายังไม่มี ให้เพิ่มบรรทัดexport PATH=...จากหัวข้อ macOS)
Windows
แนะนำ — .msi installer
- ดาวน์โหลด
.msiที่ตรงกับเครื่อง: -thclaws-<version>-x86_64-pc-windows-msvc.msiสำหรับ Windows บน Intel / AMD (กรณีทั่วไป) -thclaws-<version>-aarch64-pc-windows-msvc.msiสำหรับ Windows on ARM (Surface Pro X, Snapdragon X laptop ฯลฯ) - ดับเบิลคลิก
.msi— installer เป็นแบบ per-user (ไม่ต้องใส่ admin password) จะวาง binary ไว้ที่%LOCALAPPDATA%\Programs\thclawsเพิ่ม path นั้นเข้า userPATHให้อัตโนมัติ พร้อมสร้าง shortcut ในเมนู Start - เปิด PowerShell หรือ terminal ใหม่ —
thclawsกับthclaws-cliพร้อมใช้บนPATHแล้ว เปิด GUI ได้จากเมนู Start
Windows SmartScreen อาจขึ้น “Windows protected your PC” ตอนรัน ครั้งแรกเพราะ binary ยังไม่ได้ sign — กด More info → Run anyway
แค่นั้น — ไม่ต้องแก้ PATH ไม่ต้องเข้า dialog environment variables
ติดตั้งแบบ manual (ทางเลือกสำรอง) — กรณีไม่อยากใช้ installer (เช่น portable install บน USB stick, automation pipeline, policy ของบริษัทบล็อก .msi)
> **`%LOCALAPPDATA%` คืออะไร** — เป็น environment variable ของ Windows
> ที่ expand เป็น `C:\Users\รันผ่าน Docker
สำหรับ headless server, CI runner หรือสภาพแวดล้อม strict
enterprise ที่ติดตั้ง Rust + Node + GTK/WebKit2GTK บน host
โดยตรงไม่ได้ — มี image ทางการบน Docker Hub ที่ bundle binary
thclaws ตัวเดียวกัน รัน --serve เป็น default และเข้าถึง
project folder บน host ผ่าน volume bind mount
# Pull image
$ docker pull thclaws/thclaws:latest

# cd เข้าไปใน project ของคุณ จากนั้น:
$ docker run --rm -it \
    -v "$(pwd)":/workspace \
    -p 127.0.0.1:8443:8443 \
    thclaws/thclaws:latest
เปิด http://localhost:8443 ในเบราว์เซอร์
เพิ่ม API key — ถ้าตั้งใน shell ไว้แล้ว key จะ pass ผ่านเข้า container อัตโนมัติ ถ้าจะ inject key ต่อ container ให้เพิ่ม
--env-file .envในคำสั่ง run แล้วใส่ANTHROPIC_API_KEY=…,OPENAI_API_KEY=…ฯลฯ ในไฟล์.envที่pwdหรือจะตั้ง key ภายหลังจาก settings UI ในเบราว์เซอร์ก็ได้ — thClaws เขียนลง.thclaws/settings.jsonใน mount ก็จะ persist ข้าม container restart หมายเหตุ: Docker จะ error (open .env: no such file or directory) ถ้า pass--env-file .envแล้วไฟล์ไม่มีจริง —touch .envก่อนหรือไม่ก็ถอด flag ออก folder ที่ mount ไว้ จะปรากฏเป็น/workspaceใน container thClaws จะเขียน state ของ session / plan / team / KMS ลงที่./.thclaws/บน host — container restart ก็ไม่หาย
สำหรับการรันยาว ๆ มี docker-compose.yml แถมมาในรีโป:
services:
  thclaws:
    image: thclaws/thclaws:latest
    ports: ["127.0.0.1:8443:8443"]
    volumes:
      - ./:/workspace
      - thclaws-config:/root/.config/thclaws
    env_file: [.env]
    restart: unless-stopped
volumes:
  thclaws-config:
docker compose up -d รันขึ้น docker compose logs -f thclaws
ดู log สด ๆ
ข้อสังเกต:
--serveไม่มี auth ระดับ application ใน v0.1 ให้ bind ที่127.0.0.1ฝั่ง host แล้วเข้าจากระยะไกลผ่าน SSH tunnel (ssh -L 8443:localhost:8443 server) หรือเอา reverse proxy + auth ของคุณเองมาวางหน้า- Tag:
:latest(รุ่น ship ล่าสุด) และ:edge(currentmain) pin release tag (เช่น:0.9.9) สำหรับ deploy ที่ reproducible - Image เป็น multi-arch (
linux/amd64+linux/arm64)docker pullเลือก variant ให้อัตโนมัติตาม host - API key มาจาก block
--env-file/env_file, env shell ของ host ที่ pass ผ่าน Docker หรือที่อยู่ใน.thclaws/.envของ project ที่ mount เข้ามา — container ไม่มี keychain - container รันเป็น root โดย default เพื่อให้เขียน bind-mount
บน Linux ได้โดยไม่ต้อง juggle UID override ด้วย
user:
  "1000:1000"
ใน compose ถ้าใจไม่สบาย
เทคนิคเพิ่มเติม (build chain, ทำไม image ถึงมี GTK + WebKit2GTK
runtime, workflow ของการ publish) อยู่ที่
docker.md ใน
technical manual
ทางเลือก: Ollama สำหรับใช้งาน local ล้วน ๆ
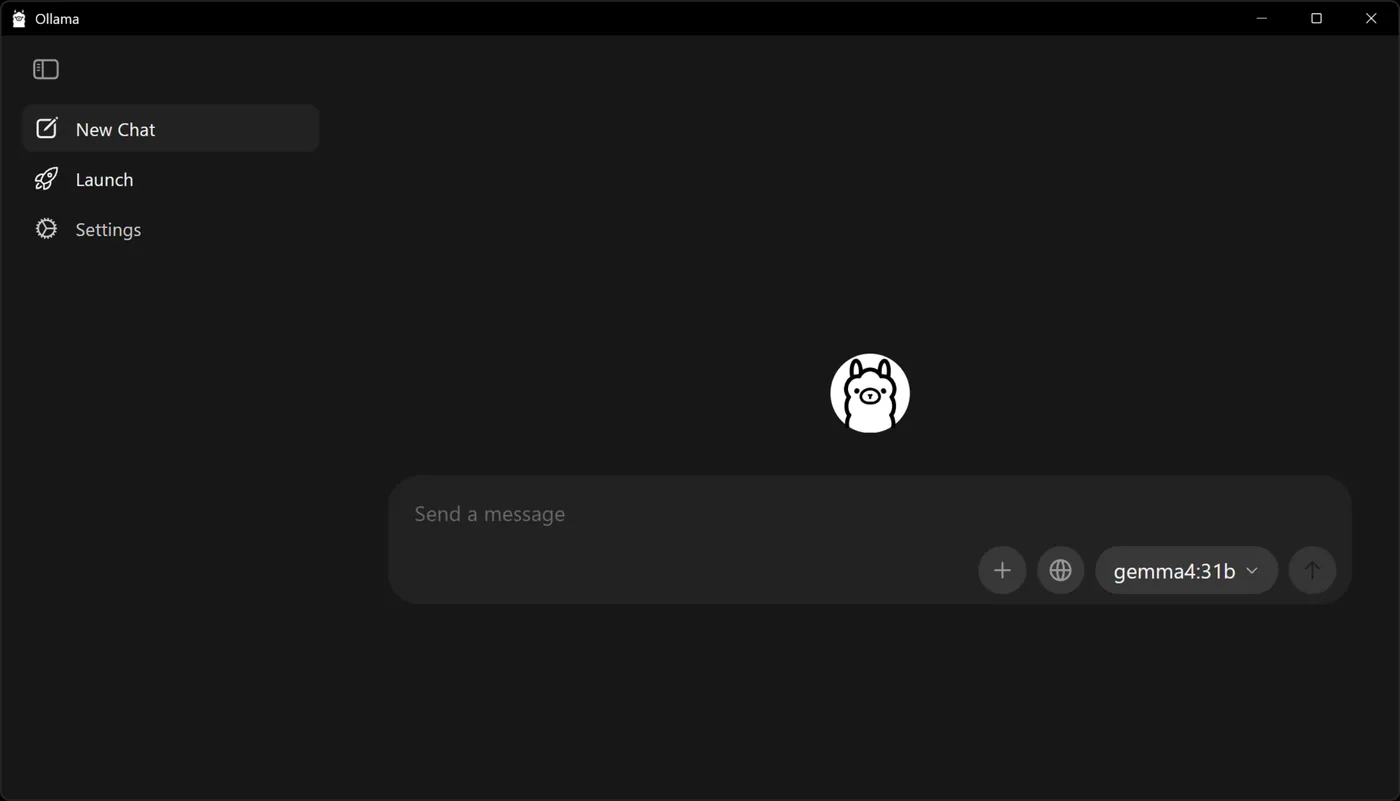
ถ้าต้องการรันกับโมเดล local ทั้งหมดโดยไม่ใช้ API key ของ cloud ให้ ติดตั้ง Ollama ควบคู่กับ thClaws:
# macOS
brew install ollama

# Linux (script installer)
curl -fsSL https://ollama.com/install.sh | sh

# Windows
# Download the installer from ollama.com/download
เริ่ม daemon ของ Ollama (ollama serve หรือเปิดผ่าน desktop app) แล้ว
pull โมเดลที่ใหญ่พอสำหรับงาน agent โมเดลเล็ก ๆ (Llama 3.2, Phi-3
ฯลฯ) มักพลาดเรื่องรูปแบบการเรียก tool และ reasoning หลายขั้น แนะนำ
ให้ใช้ Gemma 4 26B ขึ้นไป:
$ ollama pull gemma4:26b         # recommended minimum
$ ollama pull gemma4:31b         # better if your hardware can host it
งบประมาณฮาร์ดแวร์คร่าว ๆ:
| โมเดล | RAM / VRAM ที่ต้องการ |
|---|---|
gemma4:26b |
~20 GB |
gemma4:31b |
~24 GB |
Apple Silicon ที่มี unified memory 32 GB รันขนาด 31B ได้สบาย ๆ ส่วน เครื่อง Mac ที่มี RAM 16 GB ควรอยู่ที่ 26B ถ้าใช้ GPU แยก ตัวเลข ด้านบนหมายถึง VRAM ไม่ใช่ RAM ของระบบ
สั่ง thClaws ให้สลับไปใช้โมเดลนั้นด้วย /model ollama/gemma4:26b (หรือ
โมเดลที่คุณ pull มา) โดยไม่ต้องใช้ API key บทที่ 6 อธิบายตัวเลือกของ
Ollama อย่างละเอียด รวมถึง prefix oa/* ที่ compatible กับ Anthropic
ซึ่งมักให้ผลลัพธ์ tool call ที่สะอาดกว่าเมื่อใช้กับโมเดล local ตัวเดียวกัน
ตรวจสอบการติดตั้ง
$ thclaws --version                   # print version
$ thclaws --cli                       # interactive REPL
$ thclaws -p "say hi in one word"     # headless one-shot (--print also works)
ทั้งสามคำสั่งควรพิมพ์ผลหรือรันได้โดยไม่ error ถ้า -p / --print
ถามหา key แสดงว่ายังไม่ได้ตั้งค่า — ไปที่บทที่ 6
อัปเดต
ดาวน์โหลด archive เวอร์ชันใหม่จาก https://thclaws.ai/downloads.html
แล้วทำตามขั้นตอนการติดตั้งของ platform ของคุณซ้ำอีกครั้ง config เดิม
(API key, session, plugin ฯลฯ) ที่อยู่ใต้ ~/.config/thclaws/ (หรือ
%APPDATA%\thclaws\ บน Windows) จะยังคงอยู่ — เปลี่ยนแค่ตัว binary
เท่านั้น
ถอนการติดตั้ง
# macOS / Linux
$ rm ~/.local/bin/thclaws

# Windows (PowerShell)
PS> Remove-Item "$env:LOCALAPPDATA\Programs\thclaws" -Recurse
Configuration และ state ที่บันทึกไว้จะอยู่ใต้ ~/.config/thclaws/
(หรือ %APPDATA%\thclaws\ บน Windows) ถ้าต้องการ uninstall ให้สะอาด
ก็ลบพวกนี้ด้วย:
$ rm -rf ~/.config/thclaws
การแก้ปัญหา
| อาการ | วิธีแก้ |
|---|---|
thclaws: command not found หลังติดตั้ง |
~/.local/bin ไม่ได้อยู่ใน PATH — เพิ่ม export PATH="$HOME/.local/bin:$PATH" เข้าไปใน rc ของ shell |
| macOS แจ้งว่า “cannot be opened because the developer cannot be verified” | ทำครั้งเดียว: xattr -d com.apple.quarantine ~/.local/bin/thclaws |
Linux: error while loading shared libraries: libssl.so.3 |
ติดตั้ง OpenSSL 3 (sudo apt install libssl3 / sudo dnf install openssl) |
Linux: error while loading shared libraries: libwayland-client.so.0 (หรือ libwebkit2gtk-4.1) |
binary ตัว GUI ต้องใช้ Wayland + WebKit2GTK ตอนรัน distro แบบ desktop มีให้อยู่แล้ว แต่ เซิร์ฟเวอร์ headless และ container แบบบางไม่มี เลือกใช้ thclaws --cli ที่ไม่ต้องใช้เลย หรือติดตั้งเพิ่ม — ดูด้านล่าง |
Windows: PowerShell ไม่รู้จัก thclaws |
folder ไม่อยู่ใน PATH — เช็ค env var PATH อีกครั้งแล้วเปิด terminal ใหม่ |
| หน้าต่าง GUI ไม่เปิด | ลอง thclaws --cli ก่อน — ถ้ารันได้ แสดงว่า webview ของ GUI ขาด dep ของระบบ (WebKit บน Linux / WebView2 บน Windows) |
ไลบรารีที่ GUI บน Linux ต้องใช้ตอนรัน
binary ตัว GUI บน Linux ผูกกับ Wayland และ WebKit2GTK ตอนรัน
Ubuntu Desktop, Fedora Workstation และรุ่นใกล้เคียงมีอยู่แล้ว แต่ VM
บนคลาวด์ เครื่อง EC2 หรือ Docker image แบบบางมักไม่มี แล้ว thclaws
จะล้มตั้งแต่เริ่มด้วยข้อความ
error while loading shared libraries: libwayland-client.so.0
มีสองทาง:
(ก) ใช้โหมด CLI — ไม่ต้องพึ่งอะไรเลย:
$ thclaws --cli
$ thclaws -p "ไฟล์ src/main.rs ทำอะไร"
(ข) ติดตั้งไลบรารีเพิ่ม:
# Debian / Ubuntu
$ sudo apt install libwayland-client0 libwebkit2gtk-4.1-0 libsoup-3.0-0

# Fedora / RHEL
$ sudo dnf install wayland libsoup3 webkit2gtk4.1
binary thclaws-cli ที่อยู่ใน tarball เดียวกันไม่ต้องใช้ไลบรารีพวกนี้เลย
ต่อไป
บทที่ 3 อธิบายว่า thClaws กำหนดขอบเขตตัวเองให้อยู่ภายใน directory ของ
โปรเจกต์อย่างไร พร้อมโหมดการรันทั้งสามแบบ (GUI, CLI REPL, one-shot
-p / --print) ส่วนบทที่ 6 คือที่ที่คุณจะตั้งค่า provider และ API key